Ostomy Care: How To Properly Drain Ostomy Pouches
Posted by Jeanne Lowry on Aug 29th 2022

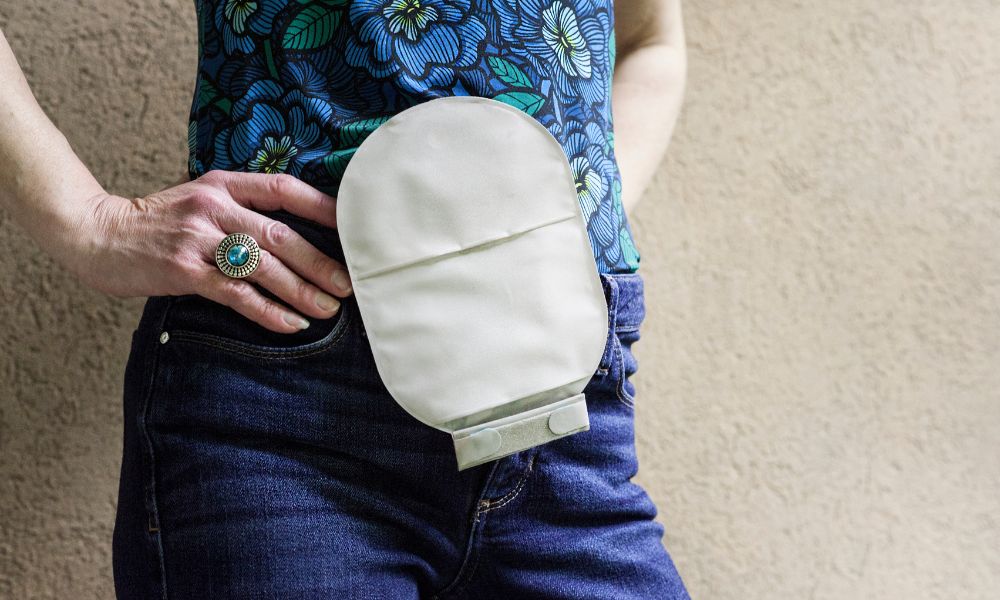
When it comes to ostomy care, there are many choices people can make regarding the type of bag they want to use. Despite the number of options available, those with active lifestyles tend to lean more toward a drainable variation. Drainable ostomy bags are easier to utilize when you’re on the go since you don’t have to carry replacements—all you need is access to a restroom.
If drainable ostomy bags sound like the best choice for you, you’ll need to ensure you know how to use them since they’re not as straightforward as disposable bags. This guide will detail how to properly drain your ostomy pouch, as well as a few other things that are important to know. After reading this list, you’ll be a natural with your ostomy bag.
Determining When To Drain It
Before getting into the draining process, we need to explain how to determine when it’s time to find a bathroom. It’s generally a good time to empty it once the bag is between one-third and halfway full. If your pouch is more than half full, drain it immediately. When these bags fill up too much, they start to push themselves away from your body and can become detached.
If you’re out in public and worried that it might be too full, there’s no need to worry—you can still check the bag without having to look at it. Simply put a light amount of pressure on the bag under your clothes to feel how full it is. Once you’ve determined that it’s time to empty the bag, you’ll need to find a bathroom to set up in.
Setting Up in the Bathroom
Draining an ostomy bag might be a little difficult in the beginning, but there are different stances you can take; be sure to try a few to see which works best for you. The most common position to take is sitting on the back of the toilet and hanging the pouch between your legs. Some prefer to sit on the toilet backward for this, but the choice of direction is up to you.
If you don’t want to sit on the toilet, crouching or kneeling next to it also works. Some might choose to drain their bags from a standing position, but that’s usually not recommended due to the higher likelihood of splashing. If you’re not able to get near enough to the toilet due to mobility troubles, you can empty it into a wad of toilet paper instead.
Regardless of the position you choose, it’s always a good idea to have some extra toilet paper ready in the event of an emergency. You also need to decide if you want to put some of that toilet paper into the water to reduce any potential splashing or if you should flush the toilet as you empty the bag.
Draining the Pouch
Once you’re situated in the bathroom, it’s time to drain the pouch. Start by lifting the opening at the bottom of the bag upward. Whether it’s held together with Velcro or a plastic clamp, now is the time to open it up. You can then slowly unroll the opening and point it down into the toilet. Remember, the closer you get your ostomy bag to the water, the less it will splash when draining.
It’s unlikely everything will fall out on its own, so if any contents remain, you’ll need to push along the outside of the pouch until it’s entirely empty. Once you’ve completely drained the bag, you can flush the toilet if you didn’t already do so during the emptying process.
Cleaning It Afterward
Before you seal everything back up, you’ll need to clean the end of the pouch. The inside and outside of the opening will likely have some residue, so you’ll need to wipe it out with some of the toilet paper you prepared for yourself beforehand. This cleaning step will not only stop the smell from following you out of the bathroom, but it’ll also make subsequent uses much easier. If some of the smell persists, you can use a bottle of pouch deodorant to get rid of it.
After you’ve finished wiping down your bag, it’s a good idea to check for any possible tears or holes. Not only will these unwanted openings lead to more of the smell getting out, but they could cause an accident before you’re able to drain the pouch again. If you notice any holes, now is the time to throw the old bag out and replace it with a new one. Fortunately, this is a rare occurrence, but it never hurts to be prepared.
Closing the Pouch Back Up
Now that the bag is empty and clean, it’s time to seal it back up. If you have a Velcro pouch, all you have to do is roll up the end and Velcro it back together. On the other hand, the clamp version will take a few more steps to close correctly.
Make sure the bar section of the clamp is about one inch away from the end of the tail. Proceed to fold the tail upward over the bar and close the hinge part of the clamp to hold it in place. Finally, make sure the bar and the hinge lock tightly together before tucking the pouch away. Once you’ve sealed and stored the bag, you can wash up and proceed with your day.
Releasing Gas As Needed
Even though you’re now equipped with all the steps for correctly draining your ostomy pouch, there’s one final thing you should know how to do: release any potential gas buildup. Sometimes your bag might feel full even when it’s not—this means gas might have built up inside. This is easy to fix, and in some cases, like when you’re alone at home, you can do this without having to go to the restroom.
Start by slightly opening the tail end of the bag while pointing it upward and put light pressure on the top of the pouch. This should only force the gas out of the bag, not the contents of it. Slowly move your fingers down the front of the pouch until you’ve removed as much excess gas as possible. Once you’ve finished, securely seal the bag and wash your hands. This shouldn’t happen too often, but it’s good to know how to remove the gas when needed.


